On advising beekeepers to look into their hives, I always say, “First, light your smoker.” I often hear – even from people who have had bees for a year or more – “I always have trouble with that” or, “I can’t keep it lit.” Then we have a smoker lesson. This post will be a smoker lesson.
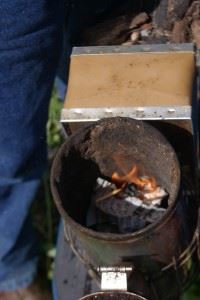
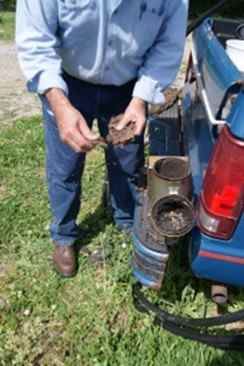
First step: lighting the smoker. Start by lighting the smoker when it is empty, or almost empty; do not try to light one full of fuel. I wad up a piece of newspaper (about one forth of a double page sheet) or any scrap paper, place it in the bottom of the smoker, and use a large kitchen match, or lighter to light the paper. Though a match you can drop into the smoker. Then I place another, similar size piece of paper on top of the lit one. The hive tool is handy for moving lit materials around inside the smoker. Next, I add my starter fuel – in my case, wood chips. – as in pet bedding I sprinkle a handful on top of the lit paper. (If you just dump them in, the flaming paper may go out.) I wait a bit, to let the wood chips ignite, then add more, once again sprinkling them on. There are several fuels which can be used as alternatives to wood chips: small pieces of burlap (about 5″x 5″ works well), dried grass clippings, pine needles, or even leaves. Any natural material which ignites quickly will work. When using some of these fuels, like burlap, you can skip the paper stage and just light the burlap.
As the materials catch, I pump the bellows to give the fire air. I then SLOWLY add more fuel, let it ignite, and pump the bellows until the smoker is about 1/2 to 2/3 full of burning fuel. As I said, there are a number of good fuel choices but, for starting the smoker, you want something which will ignite quickly. I pump the bellows until fire comes out of the top of the smoker. The smoker is now lit. The next challenge is to keep it going.
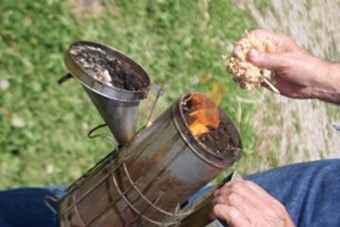
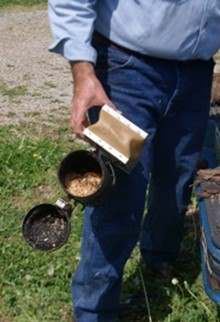
Next step: topping off the smoker. At this point, I like to add broken up pieces of bark – personal choice. I add the bark a little at a time and pump the bellows as I put pieces into the smoker until it is almost full.
In addition to its availability, I like bark because, though it takes it a while to catch fire, it will burn for hours once it does. I just need to pump the bellows every once in a while. Once I have it lit in this manner, I can leave my smoker sitting for half an hour or longer, then just pump the bellows to get it going again. I’ve used other long burning fuels as well, such as walnut shells, sumac seed pods, and small pieces of wood. As an alternative to any of the above, finer materials such as wood chips or burlap, loosely packed in the smoker until it is almost full, will stay lit long enough to check a few hives. Just do not pack it tightly, and remember to pump the smoker as you add the additional fuel.
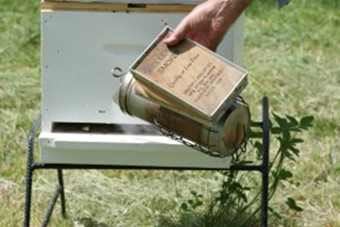
Once the smoker is well lit and loaded with fuel, I close the lid. When I pump the bellows gently, I can see smoke drifting out of the spout. You do NOT want fire to come out of the spout while you’re using the smoker on your hives. If the top 1/3 is full of loosely packed fuel, you should see nothing but cool smoke.
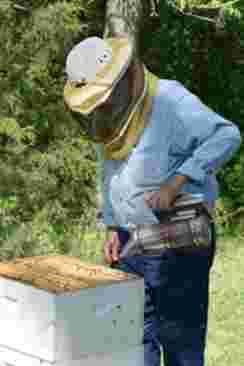
Using the smoker: When I first approach the hive, I gently puff smoke from one side of the hive entrance to the other, just to let them know I’m on my way in.
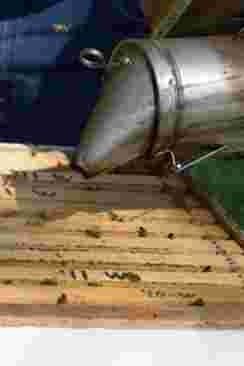
Then, I remove the outer and inner covers and, on the “up wind” side of the hive top, pump the bellows and let smoke drift across the frames. Usually, I don’t point the spout directly into the hive, but let the air currents move the smoke across it. However, if there is no wind, I angle the smoker down and move it over the top of the hive while pumping the bellows gently and directing the smoke into the frames as shown in the pictures above and below. If the smoker is well lit, it doesn’t take a lot of pumping to smoke the hive.
I find that, often, the only time I need to smoke a hive is when I first open it. If the bees fly at my veil or if I receive what I consider to be unprovoked stings, I’ll smoke them again as often as needed. But as long as they remain calm, once is enough. You might wonder, if so little smoke is needed, why smoke them at all or even light the smoker? It has been my experience that, if I do not initially smoke the hive, the bees will react at some time during my visit. If the smoker isn’t ready and I decide that I need it at some point, I have to stop what I’m doing to light it. I recomend smoking the bees when you first open the hive, then proceeding based on how they react.
Review: Lighting a smoker is as much an art as a science. Every experienced beekeeper has his or her own methods, tricks, and favorite fuels. I’ve just shared mine, and you will develop your own. Just remember the basic steps: start your smoker with a small fire, add natural fuel a little at at time, and pump the bellows as you get the fire going. Once it is burning well, with lots of smoke and fire coming out the top, top it off with more fuel. Take your time. I occasionally have trouble keeping my smoker lit too, but it is always because I hurried to light it and did not get it lit WELL.
Many or most beginning beekeepers “suit up”, meaning that they wear so much protective clothing that they can’t be stung (or think they can’t.) Why smoke the bees, then, if you’re already protected? If you don’t smoke the hive, the bees will likely become agitated at some point, flying at your veil (popping your veil as we say), making your time with them less pleasant than if you had used smoke. In addition, they can sting through most coveralls and gloves, though you may not feel the stings as much. (There are truly sting proof coveralls available, but they become very hot as the weather gets warmer). Also, agitated bees may sting pets or, if you have a small yard, neighbors. So light your smoker and use it. It is a good beekeeper’s tool.
Photos by Mary Carney.